Car Wash Forum
You are using an out of date browser. It may not display this or other websites correctly.
You should upgrade or use an alternative browser.
You should upgrade or use an alternative browser.
Post pics of your wash here...
- Thread starter JacksonV
- Start date

- Status
- Not open for further replies.


H20man
Member
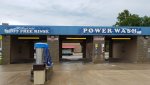
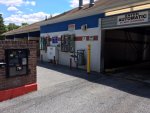
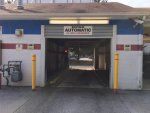
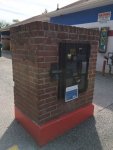
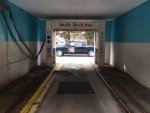
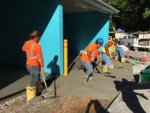
After pictures only of a 25 year old wash that sat for last 6 years. Bay walls were patched with epoxy resin then industrial coated with 2 part epoxy floor coat. 6 month and holding up fairly well.
Attachments

![Screenshot_20190502-103421_Chrome[15846].jpg](/data/attachments/0/292-54056893d3260347ac2a98951a2888bb.jpg?hash=VAVok9MmA0)
Eric H
Well-known member
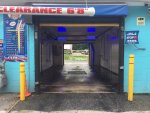
H2Oman, Is there a reason for the S bays height bar being at 8'6"? It looks like the exit may be lower than the entrance but I can't see for sure. I am thinking of lowering my door height from 12' to 10' on all but 1 bay to keep the commercial trucks from making mess in every bay.
BTW both washes looks great! I'll be adding some pictures of my own soon
BTW both washes looks great! I'll be adding some pictures of my own soon

H20man
Member
There are roll up doors on exit side and the are at 9'. So yes the entrance is higher. hence the bars set at 8'6"H2Oman, Is there a reason for the S bays height bar being at 8'6"? It looks like the exit may be lower than the entrance but I can't see for sure. I am thinking of lowering my door height from 12' to 10' on all but 1 bay to keep the commercial trucks from making mess in every bay.
BTW both washes looks great! I'll be adding some pictures of my own soon
OurTown
Well-known member
H2Oman, Is there a reason for the S bays height bar being at 8'6"? It looks like the exit may be lower than the entrance but I can't see for sure.
That looks like it was built by Superwash. If so with the roof slope to the rear and the roll up door clearance is why such low clearance.


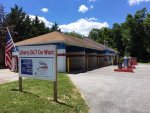
One of my washes has a roof similar to this, but the metal is bent and beat up in several areas. Any idea where I can get a similar metal to replace it with? I've been painting it, but the areas that have been hit are adding up.These are the before and after of our rehabbed wash. It was down for 7 years before we purchased it. Many thanks to the contributors to this forum!
View attachment 338View attachment 339
Hi slash, our metal looked the same way before the rehab (beat up in many places.) We decided to replace it all. We went to lowes, but home depot does the same thing. $624 replaced the metal on the whole building and we did the tear out and install ourselves. Both home depot and lowes will custom bend the metal to your specific needs too just fyi.

I was actually in Lowe's yesterday looking at the metal. I found some long sheets that were similar, but not the same, so I would have to replace it all. Any chance you could give me the item # of what you bought? Also, were you able to find the channels that sit on top and bottom at Lowe's? I didn't see anything there that I thought would work. Thanks!Hi slash, our metal looked the same way before the rehab (beat up in many places.) We decided to replace it all. We went to lowes, but home depot does the same thing. $624 replaced the metal on the whole building and we did the tear out and install ourselves. Both home depot and lowes will custom bend the metal to your specific needs too just fyi.
Hi Slash, I’ll PM the quote so you can get the specifics.I was actually in Lowe's yesterday looking at the metal. I found some long sheets that were similar, but not the same, so I would have to replace it all. Any chance you could give me the item # of what you bought? Also, were you able to find the channels that sit on top and bottom at Lowe's? I didn't see anything there that I thought would work. Thanks!
Roz
Well-known member
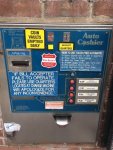
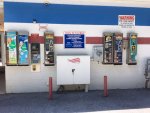
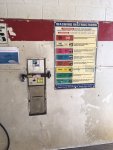
Purchased a place built in 1990 and run into the ground until Summer 2017 when I purchased it.
Attachments
-
 IMG_5685.JPG156 KB · Views: 246
 -
 IMG_5647.JPG78.4 KB · Views: 233
 -
 IMG_5688.JPG122 KB · Views: 173
 -
 IMG_5689.JPG132.7 KB · Views: 173
 -
 IMG_6545.JPG131.3 KB · Views: 178
 -
 IMG_6547.JPG140.7 KB · Views: 179
 -
 IMG_6552.JPG113.6 KB · Views: 170
 -
 IMG_6555.JPG105.7 KB · Views: 165
 -
 IMG_6556.JPG62 KB · Views: 160
 -
 IMG_6559.JPG65.2 KB · Views: 149
Roz
Well-known member
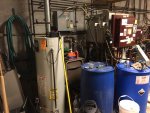
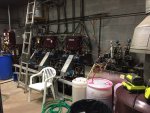
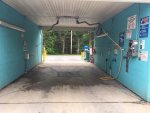
Had a museum piece for the IBA, an old, tired, Mark 7 Roto Clean that just moved water in a haphazard way. Bay was dark and dank. Bays had two working functions, HP soap and Foamy Brush. Equipment and pipes broke down (or simply broke) on a daily basis. Coins jammed in the meter boxes all the time, what little revenue there was....
Attachments


Roz
Well-known member
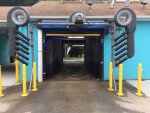
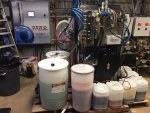
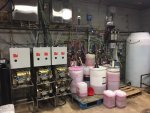
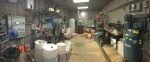
Many months later....we totally renovated the place...New equipment, new pipes, new electrical, and new (heated) floors. Most important new customers!
Attachments
-
 IMG_7431.JPG144.7 KB · Views: 119
 -
 IMG_7432.JPG199.2 KB · Views: 123
 -
 IMG_7433.JPG169.4 KB · Views: 117
 -
 IMG_7447.JPG39.5 KB · Views: 118
 -
 IMG_7449.JPG36.8 KB · Views: 130
 -
 IMG_8618.JPG113.9 KB · Views: 138
 -
 IMG_8619.JPG129.5 KB · Views: 138
 -
 IMG_8620.JPG113.6 KB · Views: 129
 -
 IMG_8621.JPG130.9 KB · Views: 125
 -
 IMG_8622.JPG67.3 KB · Views: 124
Would love information on what you did for the heated floors. Mine suck and seems like I need to do something similar to what you did. Did you replace an existing system, or put new? If new, how did you get the loops out to the concrete from the ER?Many months later....we totally renovated the place...New equipment, new pipes, new electrical, and new (heated) floors. Most important new customers!
Roz
Well-known member
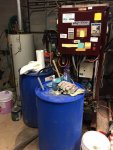
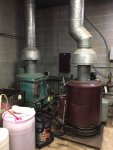
We replaced all the lines from the ER and the two manifolds on the boiler. The new manifolds came with individual controls for each line (one per bay) so we can regulate the flow/temp based on distance to the ER. The 30 year old 500K BTU boiler still runs and can heat an apartment house according to the plumber. Only 80% efficient but saving $10K for a new boiler. Getting the lines through the wall was easy for the plumber.Would love information on what you did for the heated floors. Mine suck and seems like I need to do something similar to what you did. Did you replace an existing system, or put new? If new, how did you get the loops out to the concrete from the ER?
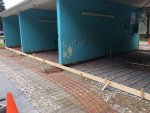
Process took 3-4 full days.
Day1: Demo floors in 5 bays and start boxes for new floors
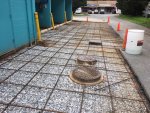
Day2: Rebar (we upgraded to a stronger than average rebar so trucks are not an issue) and slightly stronger rated concrete
Day3: plumber lays all the lines, 10"-12" apart in each bay tied to the rebar. All the lines feeding each bay go thru the new apron area that is also heated. Plumber added a pressure gauge to the lines and pressured the lines to make certain the concrete guys did not mess them up or puncture them (which seems to happen if concrete guys do not pay attention to details).
Day 3a: We took advantage of the open floors to add PVC pipes to capture the weep water from brush and wand. In hindsight I might have added a spare unused PVC for the future and a line in the exit area apron as the material is the cheapest part of the work.
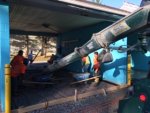
Day4: The concrete pour and grading the bay floor slope toward the pits - big difference as you can see the water run to the pit.
Day5: Plumber mixes the glycol/water mix and adds to the system. He used the anti-corrosion glycol version.
First winter all the bays became ice skating rinks that had to be closed at times for safety. This winter we never had any ice in the bays or leading up to them. Customers have noticed all the changes and improvements reflected in feedback, comments to me directly, and business. Get a good commercial plumber to do the work, a residential plumber may not be as experienced with this work. Not rocket science but reassuring to have a plumber who knew what to do and help the concrete guys not take shortcuts.
Man that seems like you had a good crew. I'm going to need to do the same. Afraid to ask what that costs. My current setup does not cover any of the front/back aprons and is only a circle in each bay, so around the edges and near the grates it does not work. Also does not work in a large section in 2 bays.

- Status
- Not open for further replies.